Building a luxury pool on rocky ground in Westchester is more achievable than most homeowners assume. Contractors use geotechnical assessments, specialized excavation methods, and crane staging to make it work. Most projects run 12–16 weeks from permits to finishing touches.
Wondering whether you can install an in-ground pool on rock in NY is a common scenario for Westchester county homeowners. Dreading the blasting, noise and long delays that come with it is just as common.
It doesn’t have to be that way. Geotechnical assessments, the right excavation equipment, and crews who’ve done this before make the difference. Many homes across Westchester County already have pools built directly into rocky yards — and the bedrock beneath them turned out to be an asset, not a problem.
Quick Answer
You can build a luxury pool on rock in Westchester, NY by using geotechnical assessments, excavation methods like hydraulic hammers or rock splitting, and crane access for equipment. These techniques create stable, long-lasting inground pools on rocky terrain. Most projects take 12–16 weeks from permits to completion.
Why Westchester’s Rocky Landscape Creates the Perfect Foundation for a Luxury Pool
Westchester’s rocky terrain makes excavation more complex, but it also provides one of the most stable pool foundations possible. Local codes ensure safety and legal compliance when building pools.
Digging into bedrock requires more planning than working in soil — but the stability you get on the other side of that work is significant. Formations like granite and gneiss can withstand compressive strengths of 25,000–30,000 psi. That makes them challenging to excavate but nearly ideal for supporting a pool long-term.
Permitting adds another layer. Pools on rocky sites need stamped engineering reports, drainage approvals, municipal sign-offs, and pool alarm certifications. Contractors familiar with Westchester regulations make this process smoother, especially on sites where the ledge changes the drainage picture.
Step One: Geotechnical Site Assessment
The first step in building a pool on rock is a geotechnical site assessment. Engineers drill borings and map soil layers to prevent cracks, drainage problems, or settling later.
Every project on rocky ground starts here. Without it, the pool risks uneven settling or drainage problems that show up years later. Engineers drill borings at least five feet deeper than the pool’s deepest end. Ground-penetrating radar may also be used to map ledges and measure groundwater.
This early testing also confirms which excavation methods are appropriate for the specific site. By identifying water tables and fracture lines in advance, engineers can prevent expensive surprises during construction.
For homeowners, this step produces:
- Boring logs showing soil and rock profiles
- Stamped engineering reports for permits
- Drainage and safety plans to meet county code
This process usually takes 2–4 weeks and is what makes everything that follows structurally sound.
Step Two: Proven Excavation Methods for Rocky Ground
Contractors use four main excavation methods in Westchester: hydraulic hoe-rams, ripping tools, rock splitting, and controlled blasting. Most projects avoid blasting entirely.
Excavating through ledge requires choosing the right method for the specific site and rock conditions. Contractors select from four main approaches depending on what they’re working with.
Hydraulic Hoe-Ram (Breaker)
The hoe-ram is an excavator-mounted hydraulic hammer that fractures bedrock into smaller pieces without explosives. The FHWA identifies it as ideal where blasting isn’t allowed. Operators use a grid pattern to keep vibration low — particularly important for residential sites with finished landscaping or structures close to the work area.
Ripping Tools and Specialty Buckets
Bulldozers with rippers or reinforced buckets pry apart fractured rock. Ripping is cost-efficient, often 50–65% less expensive than blasting, though it doesn’t work in solid ledge. In Westchester, ripping is sometimes combined with hoe-rams on sites that have a mix of soil and fractured stone.
Rock Splitting and Grout Expansion
Hydraulic splitters or expansion grout drill into rock and crack it gradually over time. This quiet method works well in sensitive neighborhoods where disturbance needs to stay minimal. It’s slower but highly controlled, and it protects nearby foundations.
Controlled Blasting (Rarely Used)
Blasting is reserved for massive, solid ledges. It follows engineered plans with vibration monitoring. Most projects in Westchester succeed without it. Sometimes it’s unavoidable, and it’s carefully engineered to reduce impact when that happens.
Comparing Excavation Options
Each excavation method has strengths and drawbacks. Hoe-rams are best for tight yards, ripping works in fractured rock, splitting is vibration-free, and blasting is rare but fast.
| Method | Pros | Cons | Best Use |
|---|---|---|---|
| Hoe-Ram | Precise, low vibration | Slower for deep ledges | Small yards and residential sites |
| Ripping | Cost-efficient | Ineffective in solid ledge | Moderately fractured terrain |
| Rock Splitting | Quiet, non-explosive | Time-intensive | Near homes, walls, or utilities |
| Blasting | Fast for large ledges | Requires permits and monitoring | Large open sites with solid bedrock |
Most Westchester contractors default to hydraulic hammers or splitting methods. These keep projects on residential sites workable even in difficult conditions.
Step Three: Equipment Access and Crane Staging
Equipment access matters as much as excavation method. Contractors use cranes, boom trucks, mats, and careful staging to protect driveways and landscaping.
Many Westchester properties have slopes, tight driveways, or mature landscaping that complicate how machinery gets in and operates. Planning this before the first truck arrives prevents damage and delays.
When needed, crews use crane access to lift shells over obstacles. Steel plates and mats protect driveways and lawns during the work. Even steeply sloped yards become accessible with the right staging plan.
If you’re curious how large machinery safely reaches tight spaces, learn more in How Do You Get Heavy Equipment Into a Backyard in Rockland?
Step Four: Construction Milestones
Building a pool on rock follows seven milestones: permits, site preparation, excavation, shell installation, structural reinforcement, plumbing and electrical, and finishing. Each stage is predictable and sequential.
1. Site Assessment & Permits
Contractors submit stamped plans to health departments and local officials. This confirms compliance with drainage, electrical bonding, and alarm codes. These approvals also verify the project is safe to build on the specific site conditions identified in the geotechnical assessment.
2. Site Preparation
Crews clear vegetation, mark utilities, and stage equipment. On rocky yards, prep ensures smooth crane access and safe hauling of excavated material. This stage may also involve grading around exposed ledges to prepare them as future landscape features.
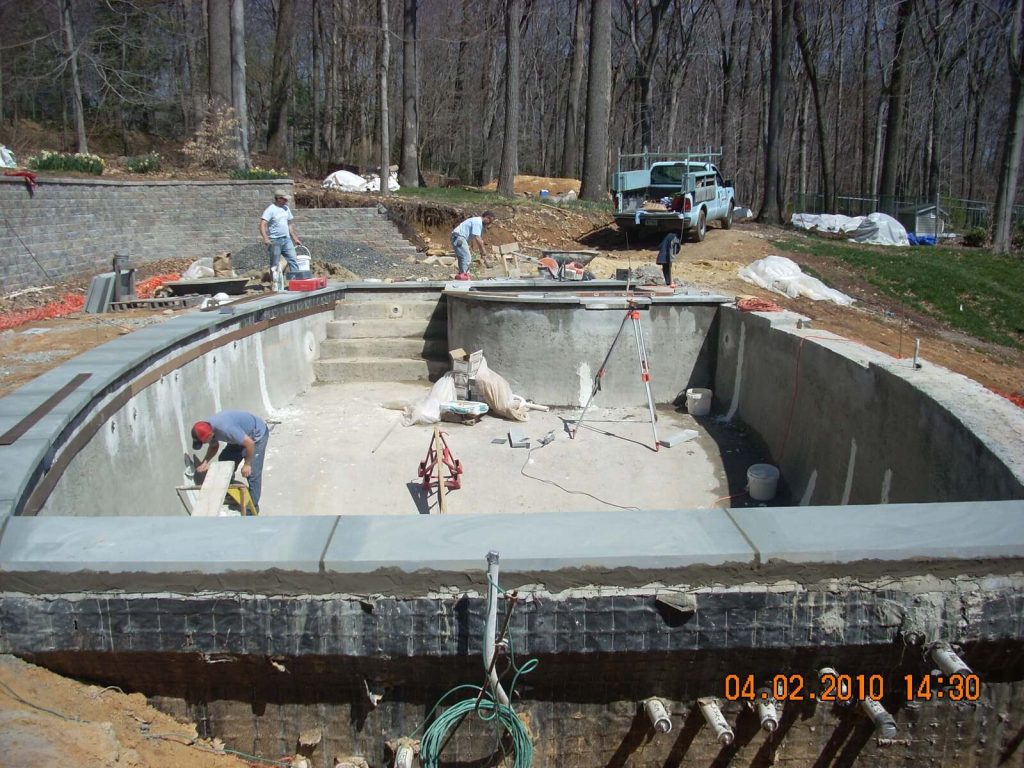
3. Bedrock Excavation
Operators use hoe-rams, rippers, or splitters to break the ledge. Blasting, if needed, follows strict vibration monitoring. Careful scheduling and daily rock hauling keep the project moving. This is the most demanding phase visually, but it’s also where you can see the pool taking shape in the ground.
4. Pool Shell Installation
Fiberglass shells are lifted into place using cranes. Gunite or shotcrete pools are framed with rebar. Precision is critical — especially when crane access is required to place the shell on a confined or sloped site. This is when the pool starts to look like a pool.
5. Structural Reinforcement
Steel rebar grids and additional concrete reinforce the shell. Backfilling is done in layers, balancing support between solid bedrock and compacted fill. Doing this correctly is what gives a pool built on rocky terrain its long-term stability.
6. Plumbing & Electrical
Systems are installed to NEC standards, with alarms tested by inspectors. Many projects on rock also use this stage to integrate heaters or smart systems — the infrastructure is already being run, so additions here make sense.
7. Finishing & Landscaping
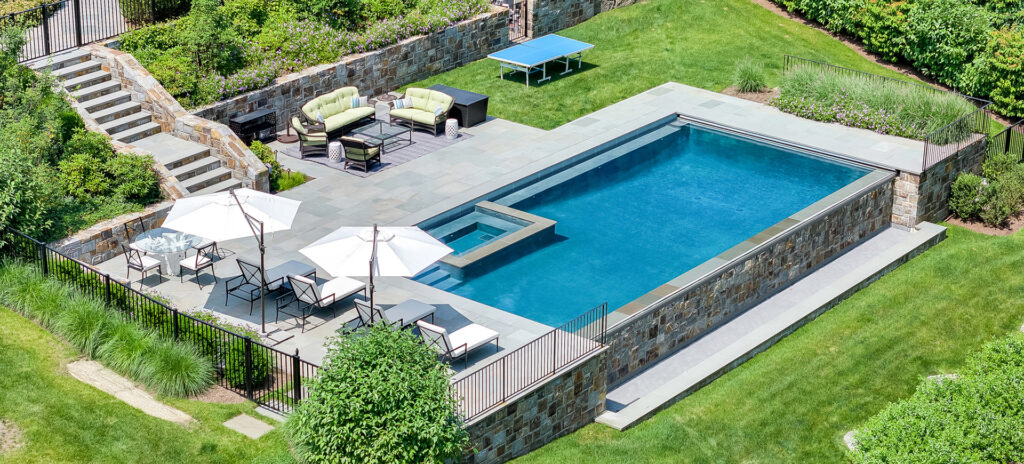
Tile, coping, and landscaping complete the project. Many builds on rocky ground incorporate natural ledge as waterfalls or seating areas, which works better on these sites than it does anywhere else. Crane equipment may return briefly to finish decking in tight spaces.
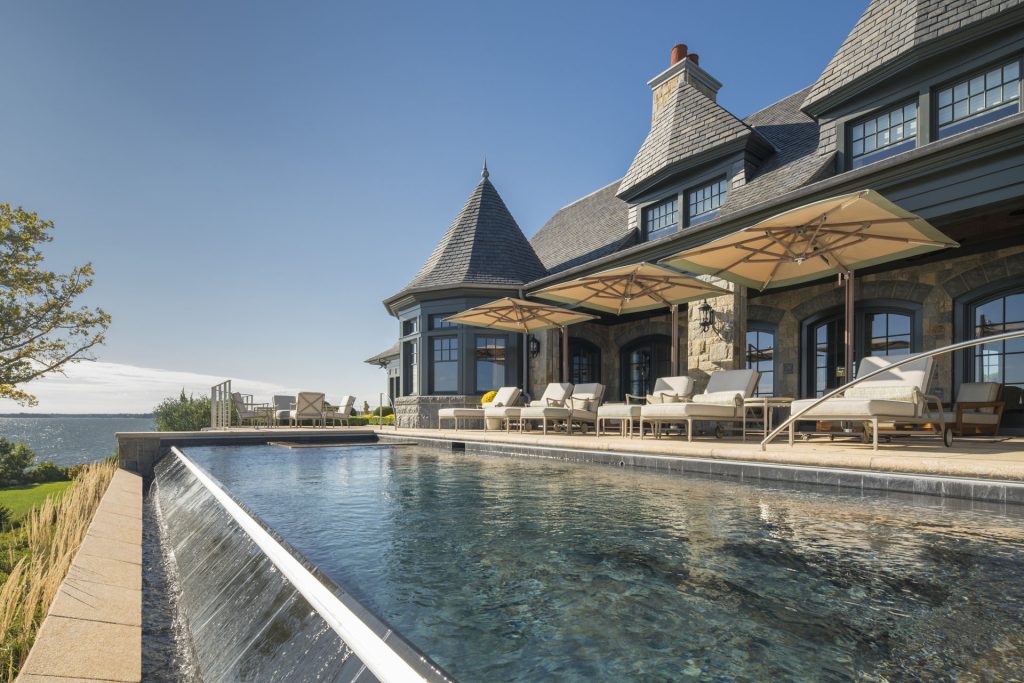
Step Five: Finishing Touches That Elevate Your Westchester Rock Pool
The final touches — tile, coping, landscaping, and lighting — are where the excavation disappears and the pool becomes what the homeowner imagined.
Some homeowners prefer sleek tile; others highlight natural stone. LED lighting and privacy plantings enhance the design. Many also add family-friendly features to make their pools work for every generation.
The ledge itself often becomes part of this. Rocks that were obstacles during excavation get integrated as waterfalls, retaining walls, or natural seating — elements that would cost real money to simulate on a flat site. This is where a rocky lot stops feeling like a liability.
Before You Dismiss Your Rocky Lot
Pools on rocky ground are common in Westchester. Expect predictable timelines, thorough permits, and design opportunities most flat yards can’t offer.
- Rock isn’t a barrier. Contractors build pools on ledge across Westchester every season. The geology that complicates excavation also provides exceptional long-term stability.
- Blasting is rare. Most projects use hoe-rams, rippers, or splitters. When blasting is necessary, vibration monitoring protects surrounding structures.
- Timelines stay predictable. A typical project on rocky terrain takes 12–16 weeks once digging begins. To plan around the summer season, see When Should I Start to Swim by Memorial Day in NY?
- Permits are thorough. Expect drainage, alarms, and electrical approvals — all of which are standard for Westchester.
- Engineers and experienced crews do this regularly. The methods are proven and the risks are well understood.
- The terrain inspires design. Natural ledges become features. Some of the most distinctive pools in Westchester are there specifically because the lot was rocky. If you’re exploring pool layouts that complement the terrain, flat-bottom pools are worth understanding.
Why Building on Ledge Is Often the Best Decision You Can Make
The homeowners who end up happiest with a Westchester pool on rocky ground are often the ones who were most hesitant at the start. The excavation is real work — it takes longer and costs more than a simple soil dig. But what you get on the other side is a pool foundation that isn’t going anywhere, on a site that gave you design opportunities a flat lot never would have.
Shoreline has built pools across rocky Westchester terrain for decades. The questions homeowners bring to us are almost always the same: Can it really be done? How long will it take? Will the blasting shake the house? The answers are yes, 12–16 weeks, and almost certainly no blasting at all.
For those exploring what’s possible, flat-bottom pool designs often pair well with rocky sites where the ledge creates natural depth variation.
Resources
Westchester.gov – Pool Design Filing Instructions
US Federal Highway Administration – Context Sensitive Rock Slope Design Solutions
GX Contractor – Between a Rock and a Hard Place
Village of Ossining, NY – Rock Excavation Methods